I’m going to go out on a limb and say that I’ll never have 40lbs of tomatoes to deal with in my kitchen (and if I do, I’ll make ketchup for all my friends). We don’t eat a ton of tomato-based stuff, so a winter’s worth of tomatoes in jars isn’t practical, probable nor desirable.
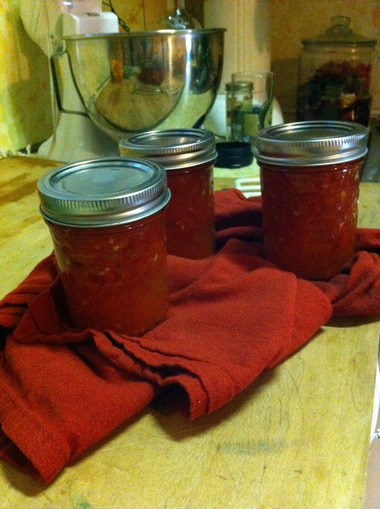
We did get a nice lot of tomatoes in our CSA share, though. They sat on the counter and taunted me for a couple days until I read Joel & Dana’s canjam post and remembered that a small-batch recipe can be made into a super-small batch recipe. A few jars of stewed tomatoes will make lovely additions to three of our meals this fall.
Plus, my lovely lady is still out on her roadtrip project, interviewing and photographing people affected by the US Military’s discriminatory policy ‘Don’t Ask Don’t Tell’, and I want her to be able to eat some of our good food when she gets back. [She was recently featured in the New Yorker under Arts, Goings on About Town. I am beside myself proud of her.]
Back to you, though.
The long weekend is over. You over bought at the farm-stand, your CSA tomatoes are piling up, you’re tired of tomato sandwiches; whatever your situation, I’m here to mitigate your ‘mater guilt.
You can make this recipe with as many or as little tomatoes as you want. It’s a jar-centric recipe. You fill each jar with the required acidity booster, so it’s entirely flexible to your situation. Refer to the Ball Complete Book of Home Preserving (by Kingry and Devine) for original recipe.
(Super-)Small Batch Stewed Tomatoes
yield as many jars as you want to fill
 This took me about 30 minutes from start to finish (not including jar processing time, i.e. the time I just spent writing this post).
1. Gather your ‘maters. I started with 1 medium-sized, juicy red heirloom variety and 8 small, lovely plum tomatoes. (Plums and other paste tomatoes do really well here since they keep their gusto when cooked and don’t just liquefy.)
I had 1lb 5oz whole tomatoes; it really doesn’t matter how many pounds you have. It’s just a matter of how many jars you want to fill.
2. Score the tomatoes and follow instructions for skinning and coring them (steps 1-3 in this post). Don’t bother coring the plum tomatoes. The only thing I did differently than in the linked post was to transfer the just-blanched tomatoes into a bowl of ice water to cool them before peeling.
[If you want, you can use the same pot of boiling water to process your jars as you used to assist peeling them (if you’re using a stainless steel stockpot and not a galvanized, canning-specific pot). I filled the stockpot with enough water to cover filled jars in the beginning, so I’d have a canner pot that’s ready to go later on.]
3. Sliver the plum tomatoes and chop other varieties to desired chunkiness (no smaller than 1/2” thickness or you’ll end up with more of a sauce) and throw into a medium saucepan or cooking pot (if you have more than a couple inches worth of tomatoes in the bottom). For plum tomatoes, leave out the top slice that’s closest to the stem.
4. Add enough water to the tomatoes in the pot to just cover them. Bring pot to a boil over med-high heat. Lower heat a tad and boil gently for 5 minutes.
5. Run your jars under hot water to warm them (no need to sterilize since processing time is more than 10 minutes). I used half-pint jars so they’d fit in the stockpot mentioned earlier. If you’re not sure how many jars your lot of tomatoes will fill, then guess based on my experience:
1.5 lbs tomatoes = easily 3 half-pint jars
6. Remove tomato mixture from heat. Drop 1/2 Tbs bottled lemon juice and a pinch of salt (optional) into each half-pint jar before filling it. Leave 1/2” headspace. (Double lemon juice and salt if using pint jars.)
7. Wipe rims clean with a damp, clean paper towel. Seal with a two-piece lid. Only seal and process full jars. [Place partially-filled jars directly in the fridge after they’ve cooled on the counter a bit and use within a few days.]
8. Process in a boiling waterbath for 40 min.