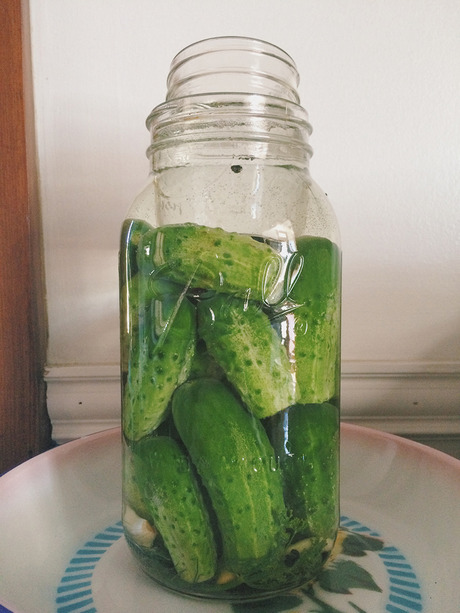
These pickles are the reason I stuck out the early bumps (or bubbles, I should say) of fermentation. They are the pickles I used to buy at the store, handing out my money weekly to the Ba Tampte company or the purveyors of pickles in the Lower East Side with their giant barrels (fishing for cukes was a lot of fun, I have to say). I now make them every year en masse when I get Tecolote Farm’s cornichons or by the 2 quart like pictured below when the garden or farmers’ market beckons. We gobble them up fast so I recommend starting a batch every couple weeks so you’re not without and maybe you might even stash some in the very back of your refrigerator into the fall when cukes are a distant memory.
Almost every brined ferment like this is the exact same in terms of ratio of salt to water that comprises the brine, but having some reference on how much of something will fit into your vessel is a skill that comes with practice.
I posted this fermented dilly beans recipe last week (wherein you can also read about why you won’t kill your friends and family if you make these cucumber pickles) and those beans are just about finished after they sat in my living room (the coolest room in the house) for 8 days.
Lower East Side Dill Pickles
makes a 2-quarts
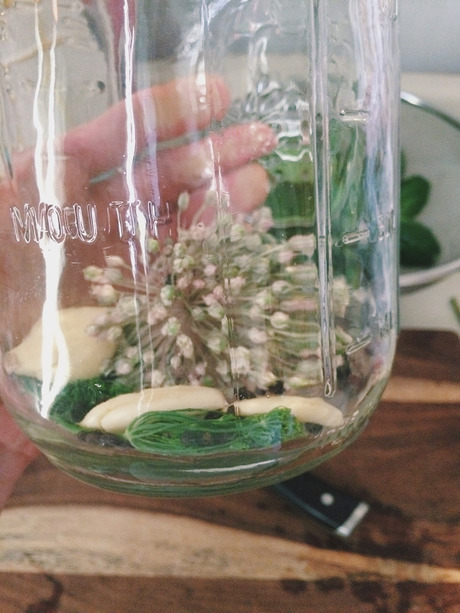
1. Place into a clean, wide-mouth 2-quart jar:
4-6 cloves of garlic, smashed or halved, and/or chive, garlic, or leek flowers if you have them
1 Tbs dill seed or 4 sprigs fresh dill or dill flowers
10 black peppercorns
(optional) 1 tsp cayenne powder (or a couple fresh/dried hot pepper)
2. Remove 1/2” worth of the blossom ends from 2lbs pickling cucumbers and drop into jar over spices. (I ate a few cukes after the market before I got home, which is why my jar is not quite full!) Pack tightly to fit them all in. Do not use slicing, salad cucumbers here, even if they are smaller than the gigantor ones, really, don’t do it. Find pickling cukes that are sometimes called Kirby from your farmers’ market or grow them. The blossom end is the lighter colored end and contains enzymes that encourage softening, which we want out of our jar!
3. In a separate jar or container combine 6 cups filtered water with 4-1/2 Tbs pickling or fine sea salt and stir until salt dissolves. Pour salt brine over cucumbers to cover them completely.
4. Place a clean, 8-oz jelly jar filled with water for weight inside the jar to weight cukes down in the brine. It’s also an excellent precaution to place the jar in a low dish or on a plate since the fermentation action causes bubbling and off-gassing which could slosh the liquid over the edge of the jar if the brine is near the top of the jar. After a day or so you can likely dump the water out of your weight jar since the salt water will pull water out of the cukes making them denser and adding more liquid to the brine.
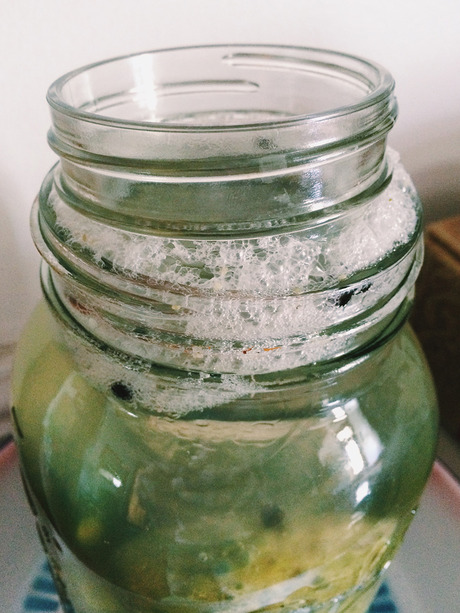
5. Check on your cucumbers every day. In the first three-five days you’ll notice bubbling and frothing around the rim on the surface of the brine. Also the brine will become cloudy; this is totally normal and to be expected as a result of the fermentation process. Do your best to skim excess foam off (without scooping out too many of the spices that have floated to the top). This keeps yeasts, molds and less desirable bacteria from taking over in your jar. Rinse and clean the jar weight when you skim, too.
6. Your pickles are done when they aren’t foaming any longer, they’re not too salty, they taste and smell like pickles and they’re the same color throughout. You may try them at any time (they’re not unsafe to eat at any point), just wash your hands before digging around in the jar with your fingers. Cap the jar loosely and place in the fridge when your pickles are done fermenting; they will keep for a year or more if kept pristinely without cross contamination from saliva fork dips or other food products in the jar.
The amount of time it will take depends on your kitchen/house ambient temperature, but it could take anywhere from 1-2 weeks, the lesser end in warmer places, the longer in cooler homes.


