

New Amsterdam Apple Pear Pie, Gluten-Free
 Permalink
 Baking is really all about attitude. I pretend like I know what I’m doing and things usually always turn out just fine, if not great. I must stress to you: I am a new baker, beginner, not a pro. Even from this perspective, it’s really not as hard as the convenience food industry makes it out to be. Making a pie crust from scratch (gluten-free, at that) is not painful, really, and doesn’t gouge your pocket book.
Word to all my gluten homies
Ok, I know many of you are down with gluten. You love it and it loves you back. But gluten makes my stomach feel funny and gives me headaches, and various other things I’d prefer not get into on the internet.
Sometimes it’s nice to shake things up a bit, right? Well, try a one-day vacation from your glue-y protein and bake this pie. Invite your celiac or gluten-intolerant pals over for sweet-fest, or better yet, invite them over to bake with you so they’re aware of any possible contamination issues in your kitchen.
Gluten-Free Dutch Apple Pear Pie
This is a two day pie. Gluten-free pie crust can be darn near flaky, but it needs a sleep-over in the fridge to develop that texture.
Evening One: Crust (time requirement: half hour prep)
I like Shauna Ahern’s recipe, which she adapted from Rebecca Reilly’s Gluten-Free Baking book, and I’ve added a few instructions/tips for beginners out there. (July 2013 update: I now have many years of adapting this crust to work out just right, check out my crust recipe here.
Spread a large piece (at least 13” long) of parchment paper out and set aside on your counter or kitchen table. Tear off a second piece about the same size.
Mix together these ingredients in a large mixing bowl:
1 cup white rice flour
1/2 cup sorghum flour
1/2 cup potato starch
3 Tablespoons sweet rice flour (yes, you do really need it, order it from the internet if necessary)
3 teaspoons granulated sugar
1/4 teaspoon salt (I use finely ground sea salt)
1 teaspoon cinnamon
Cut 1 stick of cold butter (or 8 tablespoons) into 1/2-inch slices and drop them into the dry mix. Use pastry cutter or a fork to incorporate the dry mix and butter. The mix will still be flour-y and dry, but the butter bits should be about pea-sized before you make a well in the butter/flour mix and add:
1 large egg
2 Tablespoons apple cider vinegar
Incorporate these wet ingredients into the dry crumbles with a fork until all your crumbles are about the same (there’ll still be lots of dry stuff). At this point I use my hands to smash down the dough in the bowl and assess the dry/wet situation.
Slowly sprinkle 1/4 cup ice-water into the mix to finish adhering your dough. Using your hands is the best way to firm up the crumbles. Don’t go too crazy though since the heat from your hands will alter the flaky factor if you play with it too much. Grab a big handful of dough and pat it into a ball with both hands. Set it on the waiting parchment paper. Round up the last bit of flour crumbles in the bowl and make another little ball. Set it on top of the other ball.
Using both hands, work the dough into one smooth pile and gently smoosh it down flat, to about the size of a pie plate, 9” or so. Smooth the edges of the circle with your hands and fingers so there are no cracks in the edges. Fit the second piece of parchment over the top of the dough, slide it onto a dinner plate and cover with shrink wrap (or slide your parchment-sandwiched dough into a gallon-sized ziploc and slide onto plate). Deliver to refrigerator slumber party.
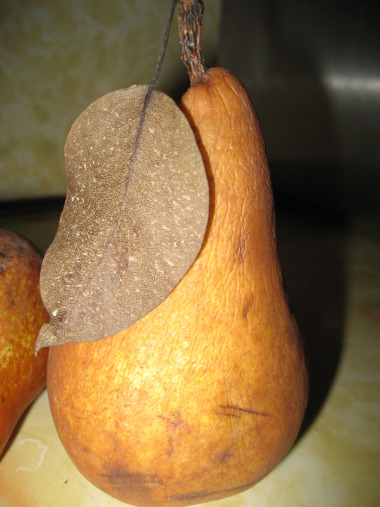 And don’t forget to admire your pretty fruits.
Day Two: Filling and Bake (time requirements: 1 hour prep, 50 min bake, 3-4 hours cool)
Remove your flat dough ball from the fridge 20 min before you’re going to pan it and fill it up with gooey goodness.
Shaping the crust:
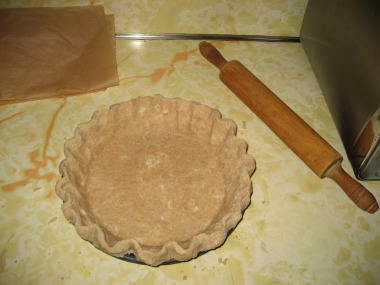 When dough is ready, keep parchment lining on both sides and use a rolling pin to roll dough out from the center in all directions. Yes, it will crack as you smash it out to a wider flatter circle. Take your pin and roll along the edges of your circle, clock-wise, to close those cracks. I have yet to make a perfect circle in my rolling adventures, but try to get a circle-like object with a 13” or so diameter.
Slide a cutting board or cookie sheet under your rolled out parchment-paper-sandwiched dough, remove top sheet of parchment, and place your 9” pie pan upside-down on the dough.
Make a swift, confident flip of your pan and cookie sheet deal (over the counter!) and the crust should sort of droop in the right-side up pan. Remove the last piece of parchment and assist the dough in sagging down snugly in the pie pan. Don’t worry if the edges crumble off. Just re-attach them as you firm and shape the edge of the crust. I followed along with the pretty pictures in Joy of Cooking for a fluted rim.
Return crusted pan to fridge while you prepare your filling.
Now, fill ‘er up!
You can fill your unbaked pie shell with anything at this point. I’ve done pumpkin and sweet potato with this crust but never a fruit; there’s a first time for everything. I just needed a pie contest to spur me into action.
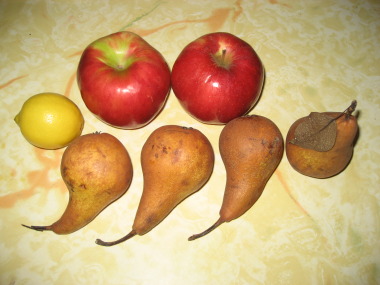
I chose a local New York apple pear combo, and since I wanted a crumb top it’s more of a Dutch Apple pie; hence, New Amsterdam Apple Pear Pie.
I used the Joy of Cooking, Gluten-Free Girl and the Chef and the ol’ interwebs for inspiration.
Helpful Hint: Prepare dry ingredients for both filling and crumb top before cutting and peeling the fruit. Pre-heat oven to 425 degrees.
Crumb top:
borrowed and adapted from the best crumble Shauna ever ate
Mix thoroughly in a medium-sized mixing bowl:
1 cup gluten-free flour mix (I combined 4 heaping Tablespoons white rice flour, 3 heaping Tablespoons potato starch, 2 Tablespoons cornstarch, 1/8 teaspoon xanthan gum, a pinch of powdered sugar and pinch of salt)
3/4-sized measuring cup bottom-lined with light brown sugar, and topped off with granulated sugar (still 3/4 cup measurement, just mix the sugars)
1 teaspoon baking powder
1/4 teaspoon salt
1/2 teaspoon cinnamon
Add 1 egg to dry mix and crumble it up with your hands.
Prepare 1/2 stick butter (4 tablespoons) melted, unsalted butter. Let it sit. (You’ll drizzle this over the top of completed pie before it bakes)
Filling:
In a large mixing bowl combine the following dry ingredients:
3/4 cup sugar
3 tablespoons gluten-free flour mix (1 1/2 Tbs rice, 1 Tbs potato starch, 1/2 Tbs cornstarch, pinch xanthan gum and salt)
1/2 teaspoon cinnamon
1/8 teaspoon salt
Peel, core and slice 2 large apples (I used Ida Reds) and 4 medium pears (I think mine were Bosch). Slice them into long slivers about 1/4”-thick, measuring the width of the area where skin was. Add to dry mix.
 Pour 1 Tablespoon fresh, strained lemon juice into mix and stir with a sturdy spatula. Let filling sit for 15 min to develop a juicy thick sauce.
Remove crust from fridge and spread filling into crust evenly. For good measure I chunked up 2 Tablespoons cold, unsalted butter and placed chunks on top of filling before adding crumb top. Use your hands to cluster and place crumb topping evenly covering apple and pear slices. For a finishing, browning touch, drizzle your prepared melted butter evenly around the crumb top.
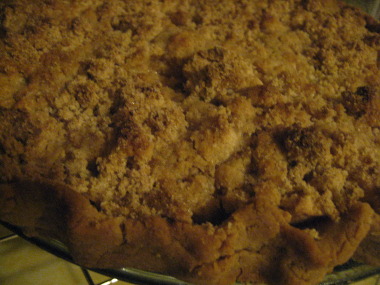
Bake for 30 min at 425, reduce heat to 350 degrees and bake for another 20 min. When I dropped the temp, I also fashioned my pie an aluminum foil hat, just a folded-into-circular piece of foil to keep the crumbs and top of crust from browning much more.
You’ll know it’s done when you see the fruit juices bubbling through holes in your crumb and a knife poked through one of those holes pokes a “just tender” (J of C) piece of fruit.
Let sit for 3-4 hours to allow the filling to thicken and firm up.

Reader Comments