


No-can strawberry jam
 Permalink
I’ve received a number of questions about canning sweet spreads lately. One that always pops up is: do I have to waterbath can it?
The answer is no. You can make any kind of jam/preserves/etc. without lugging out your big-ass stockpot/canner pot. Just don’t make a bunch of it because you’ll need to eat it up lickity split (within 3-4 weeks).
Small-batches of jam are cool because:
1. Who buys a jar of jam at the store or farmers’ market to stash away indefinitely in the pantry? Um, no one I know.
2. Rarely do urbanites have enough fruit to warrant a canner pot canning session. Good (translate: anything you want to eat) fruit is expensive! I dished out $10.16 for two quart-sized baskets yesterday, and that was a steal (yaay food co-op!)
3. You don’t double cook the fruit (once in the pot on the stove to reach a gel, and then again in the canner pot to kill any spoilers in preparation for shelf storage), hence your fruit keeps more of its integrity.
;) No-can Strawberry Jam Recipe
No-can Strawberry Jam Recipe
modified from Linda Ziedrich and David Lebovitz
Yield 1 pint
Zee goods:
1 lb of hulled, stemmed strawberries (which means you need a quart or two pints of whole strawberries from the farmers’ market.) My quart o’ berries weighed in at ~1.75 lbs at my co-op. And I used all but a few.
1 lemon, which yields 2 Tbs strained lemon juice
1 cup sugar
zest of half your lemon
Zee method:
1. Prepare your fruit. Slice off stem portion. Hull them by taking a paring or steak knife and carving out the white inner cavities of the fruits. Slice stemmed, hulled fruit as thinly as you wish. I’m a sucker for a chunkier jams. The finer you slice (or mash) the faster the mixture will gel.;) The most depressing thing I’ve done all week, slicing up these beauties.2. Place prepared fruit and sugar together in a 10 or 12” stainless steel skillet, pot or (enameled) Dutch oven (NO non-stick cookware!) Any big, wide-bottomed pot will do, but do try to use a heavy-bottomed one (like copper-bottomed) that will disperse heat evenly.
The most depressing thing I’ve done all week, slicing up these beauties.2. Place prepared fruit and sugar together in a 10 or 12” stainless steel skillet, pot or (enameled) Dutch oven (NO non-stick cookware!) Any big, wide-bottomed pot will do, but do try to use a heavy-bottomed one (like copper-bottomed) that will disperse heat evenly.
3. Let strawberries and sugar stew for an hour, stirring every so often if you think of it. You can skip this step but the sugar holding tank will allow the strawberries to release more of their juice and keep some of the bright red color.
4. Add lemon juice and heat over medium heat until you can’t feel any more sugar granules.
5. Bring to a boil (takes about 4 minutes), mash half of the berry chunks with a potato masher if you’d like a smoother, less chunky jam.
6. Boil jam, stirring only to keep sugar from scorching bottom (not constantly) for about 10 minutes. Pay attention to the bubbles. (Even smaller batches will take half the time!)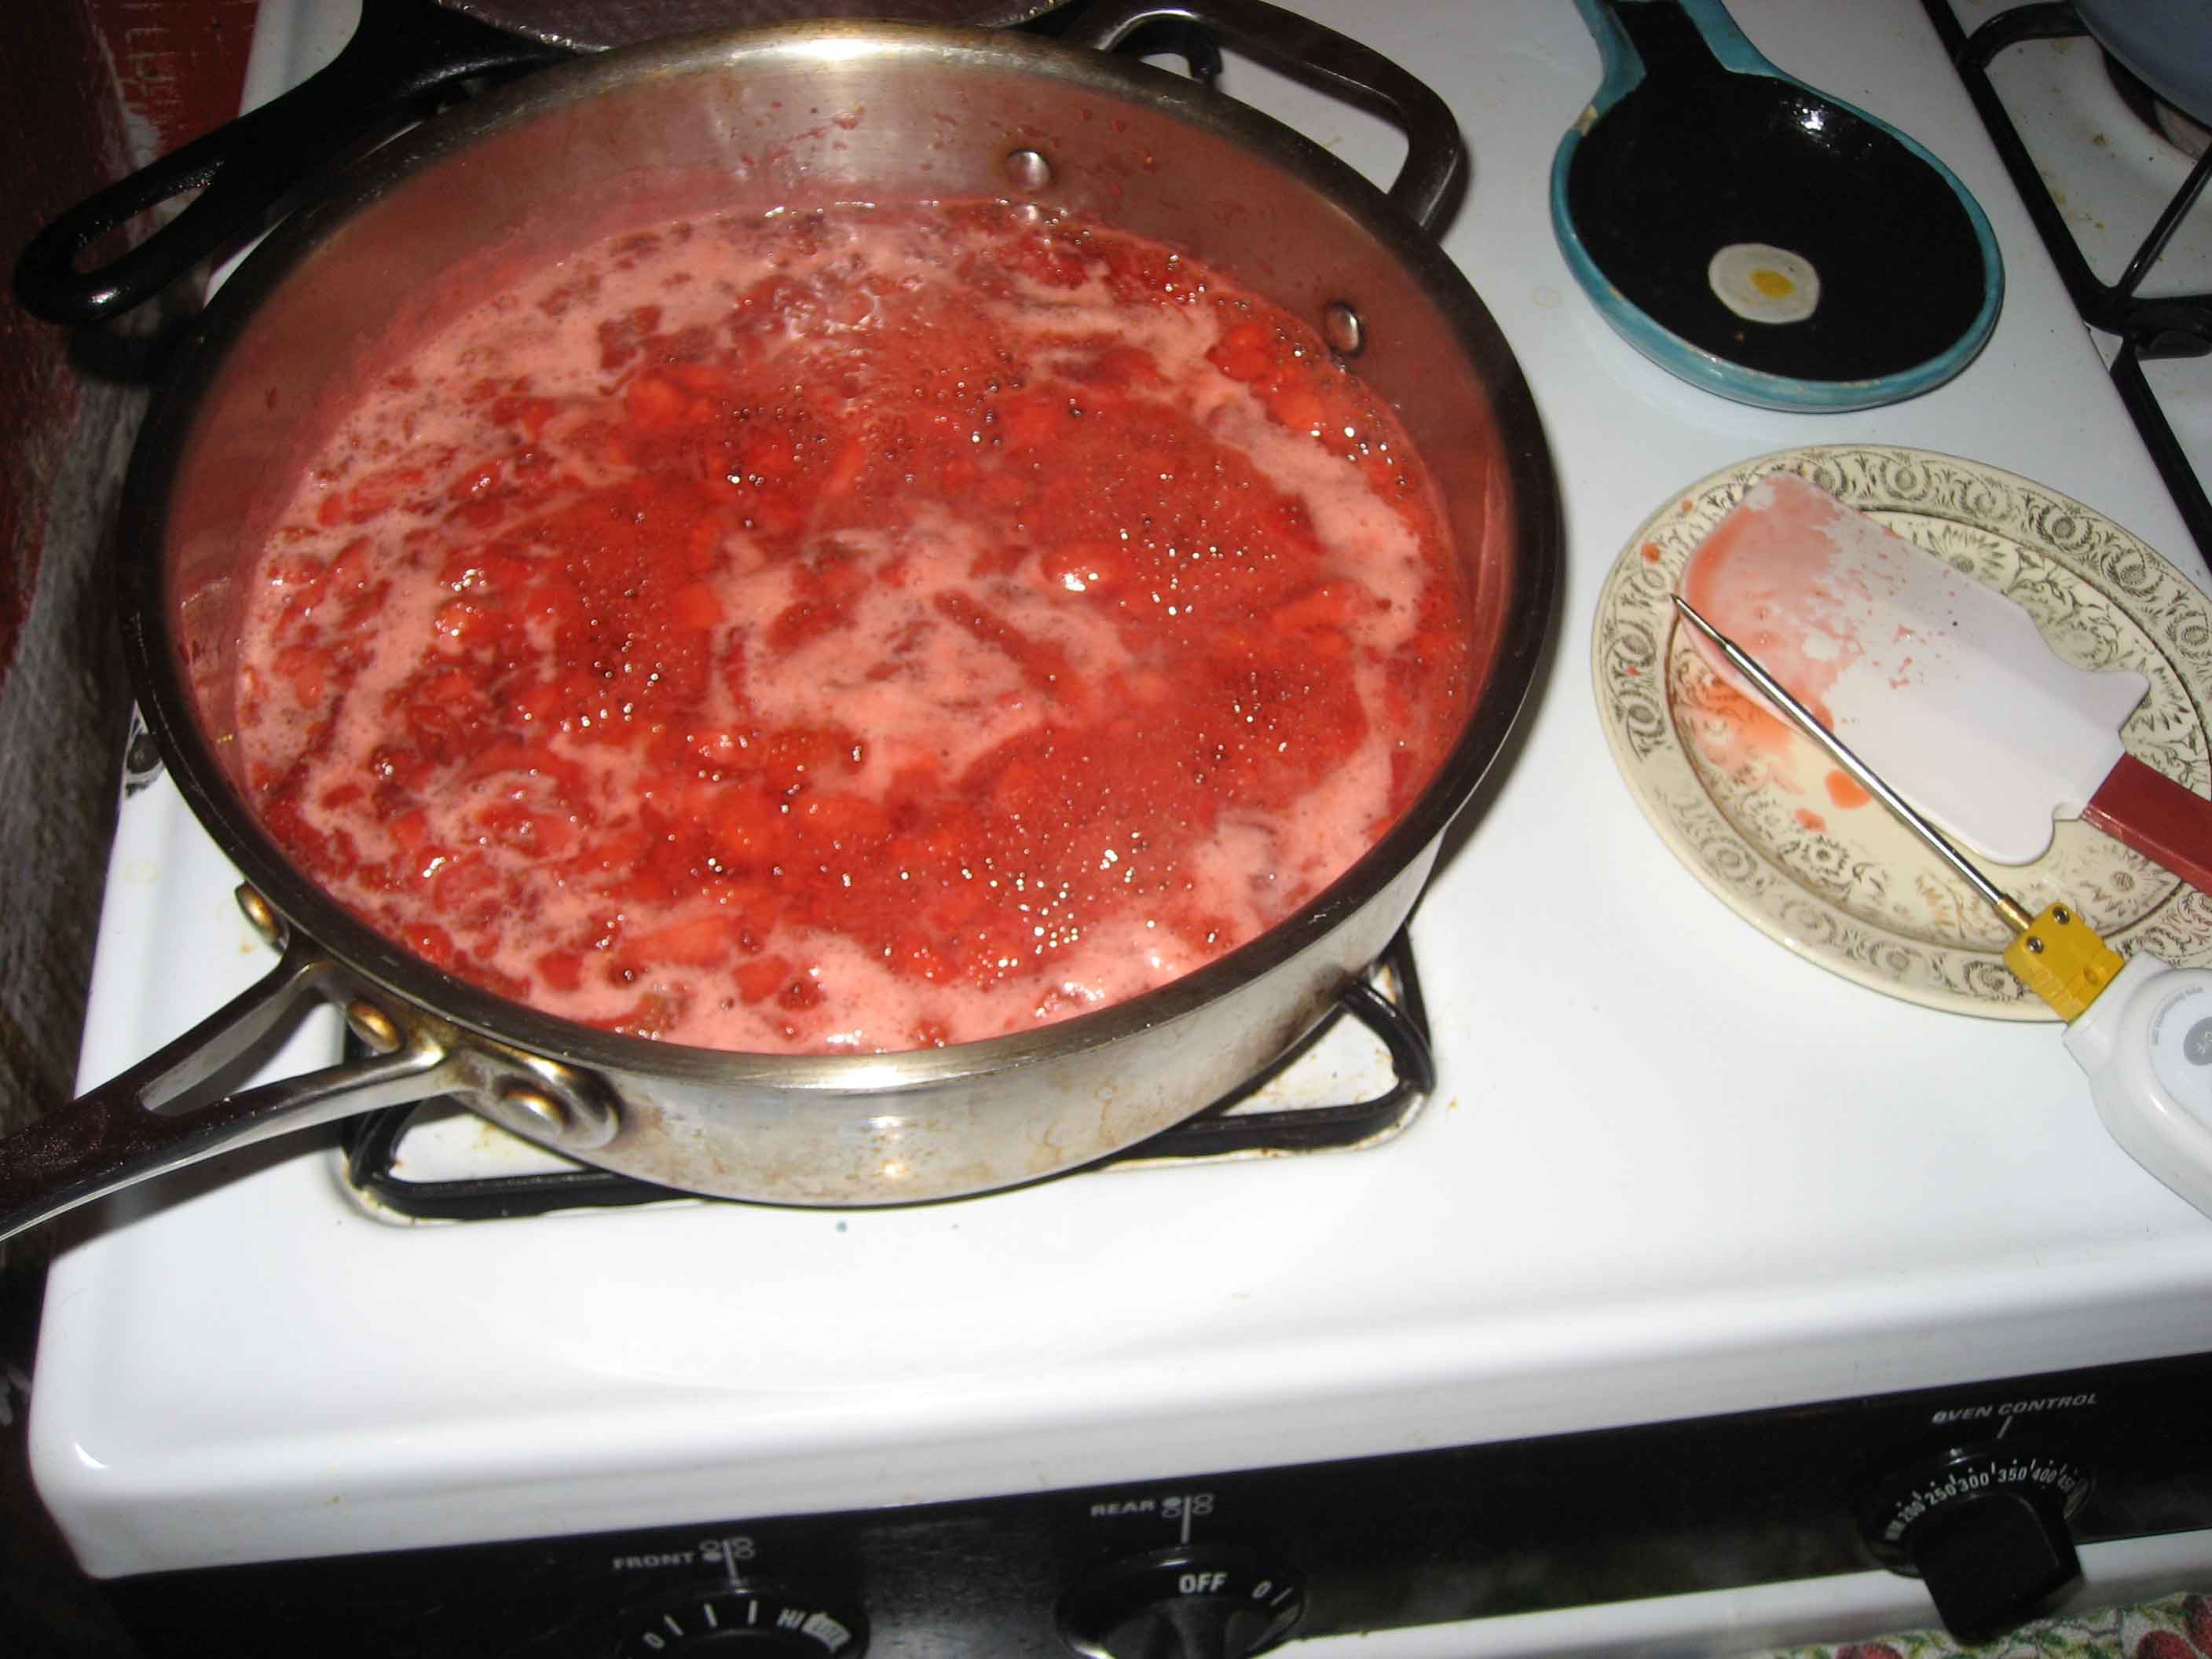 Early bubbles, lots of ‘em and they’re generally smaller.
;) Gel indicator bubbles are darker and spaced farther apart, see!7. Remove pot from heat, let strawberries sit for a few minutes while you get jars ready. Skim foam now if you want to. Foam is a matter of aesthetics not safety. I usually try to skim (using a broad spoon in repeated strokes over the top), get frustrated and then say eff it. Zest half your lemon and stir gently to combine.
Gel indicator bubbles are darker and spaced farther apart, see!7. Remove pot from heat, let strawberries sit for a few minutes while you get jars ready. Skim foam now if you want to. Foam is a matter of aesthetics not safety. I usually try to skim (using a broad spoon in repeated strokes over the top), get frustrated and then say eff it. Zest half your lemon and stir gently to combine.
8. Fill one pint or two half-pint jars with hot sink water a few times, let them sit full of hot water for a minute or so. You’re just heating up the jars so they don’t break when you pour in the just-boiled jam.
9. Pour jam into warm jars, wipe rims clean with a damp paper towel or clean cloth, add (re-used) lids and let cool on the countertop.
10. Place jar(s) in fridge after countertop cooling for an hour or two.
Eat within 3-4 weeks! ;) I’m especially attached to the two half-pints I made this morning because I threw into the mix of local berries a single—the only newly-ripe—berry from my back deck plant. A girl’s gotta get creative when the back deck harvest is meager.
I’m especially attached to the two half-pints I made this morning because I threw into the mix of local berries a single—the only newly-ripe—berry from my back deck plant. A girl’s gotta get creative when the back deck harvest is meager.
Reader Comments (17)
If you like chunkier jams, why bother slicing them? Just hull them, throw them in the pot, and whack 'em a few times with a potato masher. :D
Somehow slicing just seemed like less damage to the fruits ;) Mashing them was out of the question! I've got preserves stewing on the countertop, too. With those, I haven't touched the berries besides hulling and stemming...Am I a whole fruit purist?!
Looks delicious! And I agree with all your reasons. There's no way these jams would last long in my fridge. Thanks for the post.
Perfect timing! I got a huuuuge quantity of strawberries in this week's CSA share, and I was just trying to figure out how I was going to manage to use them all up.
i love strawberry skillet jam! i put about half that amount of sugar in though, it really needs next to nothing and like one of the commenters, i just mash mine a few times and it's heaven. i like to freeze it as well. YUM.
I love the idea of reducing sugar. I'll have to give that a try next time, thanks ecogrrl!
Have you tried using a steam canner? It takes minimal water (enough to bill the bottom to the stand for the jars), heats up quickly for sanitizing then processing. It is much more efficient than the water bath (which I also use)
Hi @Splash, I've heard of the steam canner, but have never seen nor used one. Though it may actually be safe and effective, I don't see it promoted by USDA, so I personally haven't explored it much. Most of my batches are so small anyway that I have smaller pots o' water for the waterbath and I use that water once it cools for my plants.
I just tried this recipe for the first time. I used Sucanat instead of regular sugar and it has a wonderful flavor! Thanks!
Hello - I have made jam like this as well and absolutely love it. A question I've had though - can you mail this jam? Or does it need to be refrigerated continuously? Any guidance is appreciated :)
Can I just store the homemade jam in an airtight container and not a jar?
Elizabeth, you will need to can it if you want to mail it. Both for keeping it from oozing from the jar because of the pressure in transit and for ensuring it doesn't grow any yeasts/bacteria/mold over the few days it's not refrigerated. I regularly will waterbath can super small batches (look up ground cherries in this blog) and I have instructions for improvising canning equipment from what you already have on hand in both of my books. Good luck!
Omotayo, of course, please use whatever airtight container you have, doesn't have to be a jar.
Thank you so much for this simple jam recipe and guide! My six-year-old daughter and I enjoyed making this together to help have a screen-free summer. This was super easy to follow and I appreciated its simplicity!
I'm so glad to find this recipe I don't want to can. But why no nonstick pots?
Hey Lisa,
I go into depth on the topic in both of my books, but if you can do a little sleuthing online too. The chemicals they put on pans to be nonstick can leach into our foods and create a harmful off-gassing, not to mention it chips off over time directly into our foods. Phasing out of non-stick is a good idea and starting with a good enameled cast iron or regular stainless steel skillet or French oven is a perfect vehicle to accomplish almost all the cooking you'd need to do so you don't have to replace every pot you have right away.
Can you use Stevia in this recipe or does it have to be sugar?
Hi Patti,
Yes, you can use stevia, but you might need to also use a pectin product like Pomona's Pectin since sugar when combined with lemon juice helps the chopped up fruit's severed pectin bonds find each other again and form a gel. Let us know how it goes!