Making bone broth
Friends, I’m here to tell you that you, yes you, the busiest of busy people can manage this process. How do I know this? Well, for one I am the busiest of the busy people and of the things that have gone on hiatus in this household over the past year, the bone broth marches on.
A few reasons for this include:
- Because we use it all the time and it is expensive to purchase regularly
- Because the labor involved is in fits and spurts and doesn’t require all your time all at once
- Because it is so dang good for us
Get started with DIY stock and bone broth:
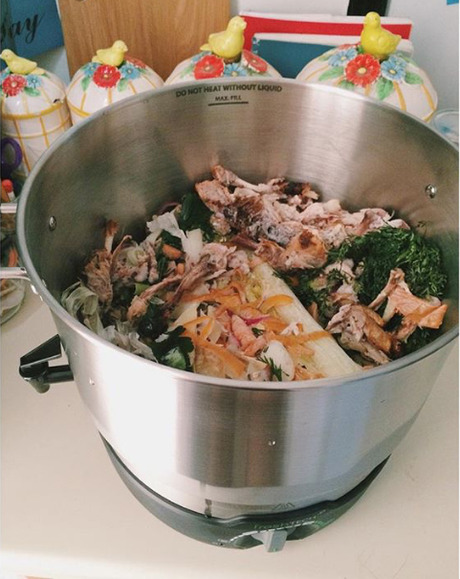
1. Save your bones from regular meals. Holiday feasts are an instant stock making situation, but even just the collection of bones from daily meals will eventually yield a stock. I even take home bones from restaurant meals (yes, it’s totally for our dog, kind server!). We separate our stash into three freezer bins: chicken & poultry, beef & pork, and fish. When a bin fills, it’s time to make stock! Save veggie scraps too. We shove them in amongst the bones in each bin. It’s best to make stock when you have enough to fill a 6 or 8 quart pot. Lesser volumes will cook down low and take away from your ‘stock pile’ (haha)
2. To make the stock, submerge bones and veggie scraps with just enough filtered water to cover them completely. Add a slosh (up to 1/4 cup) of apple cider vinegar and let the bones sit at room temp for an hour. Go the crockpot route if you are nervous about leaving a burner on super low for 24-48 hours. Personally I’m fine with leaving a burner on low, but to each their own.
3. Pot on the stove: Turn on the heat under your pot and allow to slowly reach a simmer. It will take about 30 mins or more depending on the size batch you are making. Skim off all that bubbly sudsy stuff that surfaces as the heat increases. If you miss or have to omit this skimming step it’s not the end of the world.
Crockpot: Turn on heat to the lowest possible setting. My circa-7-years-ago crockpot is too new and runs really hot. You don’t want your stock to boil and if you want to try and skim (like above) you want it to heat really slowly. Do your best and figure out what setting allows you to achieve the lowest temp. Maybe you set it to 10-12 hours low initially to get it to a simmer then drop it to the ‘stay warm’ setting for the duration of the cooking.
4. Put a lid on it leaving the tiniest crack to allow some steam to escape. Reduce heat to just below a simmer and allow to cook for 24 to 48 hours, longer times are totally fine provided you aren’t simmering and evaporating away your stock, the liquid level will decrease some, but shouldn’t be dropping dramatically. Pay closer attention and check on it every few hours for your first few times while you’re getting the groove with your stove, pot, crockpot, etc. For a long cooking stock, you should not see active bubbling when you open your lid.
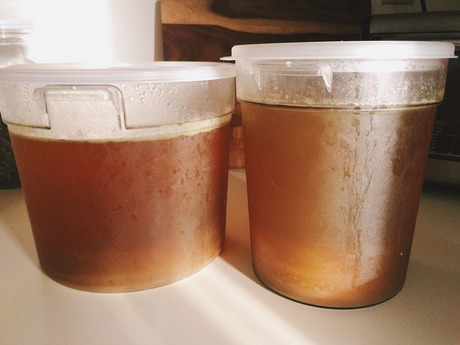
5. When it’s finished to your liking or time constraints, strain bones and scraps from stock and pour into a large bowl or Cambro container and allow it to cool on the counter for up to 2 hours. (If you are pressure canning it, your stock can sit out until it’s at room temp, but just remember to boil any stock you don’t can for 10 minutes to kill anything that may have grown at room temp past the 2 hour safe zone.) Putting it in smaller containers or partially submerging your bowl or container in a sink full of ice water will help it to cool faster.
6. After it has chilled in the fridge overnight, you can skim off the fat (schmaltz) that has risen to the top. I save mine in a bag in the freezer and use it for sautee’ing (best fat ever and can sustain high cooking temps safely). Or skip that step and just freeze it in bags or straight-sided jars. (Or pressure can it so you can store it at room temp and free up freezer space.)
Homemade stock, like storebought once opened, will last up to a week in the fridge before it needs to be boiled for 10 minutes to kill things that could cause stomach upset. You lose some volume, but if you have stock in the fridge you forgot about, but don’t want to throw out, just boil it.


 Wednesday, November 25, 2015 at 12:15PM


Reader Comments (6)
couple of things. what is a Cambro container, please? and your image of the pressure canned stock makes my canning-momma heart proud. I make a lot of broth/stock and can it - my partner prefers the chicken but of course we get such lovely big vats of Turkey when there is a big holiday... yum.... now to find more jars.....
Hey Teri, a Cambro is the type of plastic container pictured above. They are typically found online or in restaurant supply stores. They're food-safe plastic containers and I find having a couple on hand is so helpful for my straining, preserving and other food projects!
In the photo it looks like you used your canning pot? I have one but you didn't give instructions on using it? Thanks!
Hi Susan, the Ball electric canner pot serves just like an oversized crockpot so you can follow the same suggestions for making stock in that!
Gorgeous!! I unabashedly ask folks to save their turkey carcasses for me at this time of year. It is so handy and it's free! I save my veggie scraps and onion skins - my family and friends think I am nuts.
Here's a great tip. If time allows, roast those luscious bones before adding water. It creates more flavor. I make huge batches in my electric roaster to can.
After recently getting a dog, I've finally found a way to use every single bit of a chicken! After making the bone broth, I toss the bones, skin, carrot, onion peels, etc. into a blender and puree it into a doggy paté - he's little so I just give him a tiny bit every day with his crunchy food, but man is he happy about it.
Although I would say he shifted very quickly from thinking himself a very lucky rescue dog to thinking himself quite entitled! :)