Lacto-fermented dilly beans
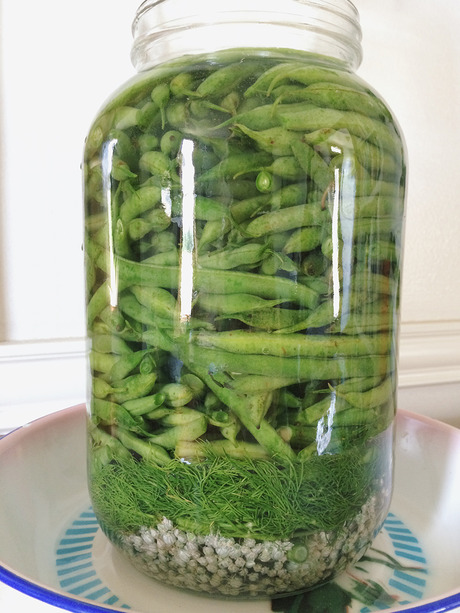
The rains have ended here in Austin and we are drying out with a thrust into summer. These beans are one of my favorites for the year’s ferments. The recipe is written for a single quart, which is an excellent volume for a first foray into fermenting. Feel free to double triple or quadruple the recipe to your heart’s desire and jar/vessel’s volume, just use the ratio of 3 Tbs salt to 1 quart water and pour enough of that brine over the veggies to cover them. (The jar I used for this batch is actually a gallon jar and I fit about 3-1/2 lbs of green beans in it.)
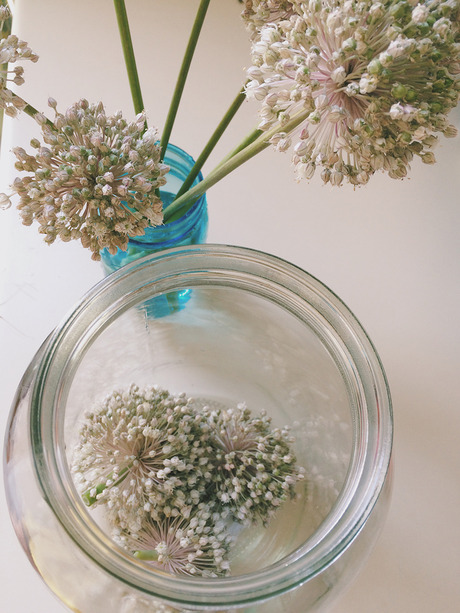
I used leek flowers instead of garlic here and encourage you to use your spring allium flowers if you still have them around when the beans are in!
A fermented pickle doesn’t use vinegar to acidify, instead, specific bacteria and microbes slowly culture the veggies. We’re creating just the right environment for these specific bacteria and not for the deadly or spoilage kinds. So give this a try without the worry of killing your friends and family! Skimming your ferment as it gets going will ensure you don’t grow mold and other things on the surface layer, which (even if your human instincts didn’t alert you to not eat multicolored mold) would not kill you either. I like to clear all this up as you’re considering making the project and then tasting it as you get going. I know we’ve all grown to think keeping things out of the refrigerator for longer than 2 hours is dangerous, well the salt and acidity that slowly increases in your jar will keep the dangers in check.
Pickle on my friends!
Fermented Dilly Beans
makes 1 quart
1. Place into a clean, wide-mouth quart jar:
2 cloves of garlic, smashed or halved, or chive, garlic, or leek flowers (pictured above)
1/2 Tbs dill seed or 2 sprigs fresh dill or dill flowers
5 black peppercorns
(optional) 1/2 tsp cayenne powder (or a fresh/dried hot pepper)
2. Remove stem ends from 1 lb green beans and drop into jar over spices. Pack tightly to fit them all in.
3. In a separate jar or container combine 2 cups filtered water with 1-1/2 Tbs pickling or fine sea salt and stir until salt dissolves. Pour salt brine over beans to cover them completely. It’s ok if the green beans are not quite covered with water yet; the water from inside the beans will top off the brine.
4. Place a clean, 8-oz jelly jar filled with water for weight inside the jar to weight beans down in the brine. It’s also an excellent precaution to place the jar in a low dish or on a plate since the fermentation action causes bubbling and off-gassing which could slosh the liquid over the edge of the jar if the brine is near the top of the jar. After about an hour you can dump the water out of your weight jar since the salt water will pull water out of the green beans making them denser and adding more liquid to the brine. UPDATE: I forgot to mention that if you are using a jar to weight your dilly beans, then you should put a tea towel or muslin cloth over the top of the jar to keep flying things out. If you are using glass pickling weights that do not stick out over the top of the jar, then you can just put the jar lid on very loosely (preferably just set it on top) as the process of fermentation will create gas that needs to escape.
5. Check on your dilly beans every day. In the first three-five days you’ll notice bubbling and frothing around the rim. Do your best to skim excess foam off (without scooping out too many of the spices that have floated to the top). This keeps yeasts, molds and less desirable bacteria from taking over in your jar. Rinse and clean the jar weight when you skim, too.
6. Your pickles are done when they aren’t foaming any longer, they’re not too salty, they taste and smell like pickles and they’re the same color throughout. You may try them at any time (they’re not unsafe to eat at any point), just wash your hands before digging around in the jar with your fingers. Cap the jar loosely and place in the fridge when your pickles are done fermenting; they will keep for a year or more if kept pristinely without cross contamination from saliva fork dips or other food products in the jar.
The amount of time it will take depends on your kitchen/house ambient temperature, but it could take anywhere from 1-2 weeks, the lesser end in warmer places, the longer in cooler homes.


 Wednesday, June 3, 2015 at 10:30AM


Reader Comments (10)
i love this post! you make it sound so easy. as the fermenting-fan that i am, i will try this recipe for sure!
So glad this made it to the blog, KP!
Do you put a lid on the jar while it's fermenting, or keep it covered somehow?
Hi Amy,
Great question. I realized I left that detail out of the post, just updated it to answer your question! Thanks for reading and commenting.
Can you use ceramic pickle barrels for a large batch with good results?
Lacto-fermented Dilly Beans
You need to check your recipe because if these are Lacto-fermented, they should contain WHEY.
Sandra,
Thanks for your note. Lacto-fermentation actually means that the product of fermenting vegetables produces lactobacillus, which is also an end product in fermenting dairy, but is not required for vegetable ferments to successfully produce lactobacillus. I choose not to add starter cultures to my vegetable ferments as the process of wild fermentation always produces these super-nutritious end product live cultures themselves.
Happy fermenting,
Kate
Sam,
Ceramic crocks are absolutely great for fermenting larger batches. If they are antiques, just be sure to check and make sure they are not from an era when ceramics were glazed with lead paint!
best,
Kate
My video answers a lot of these questions:
https://www.youtube.com/watch?v=Na_mYmIHkbE
These sound absolutely fabulous! I'm trying this recipe as soon as I can get fresh organic beans. Which I guess will be next summer when I grow them in the garden since we have 2 ft. of snow now here in Michigan, but it's definitely something to look forward to!